Tracking and managing changes to source code using Git and GitHub
Welcome back to our journey into the cloud. Previously we learned how to stand-up an Ubuntu webserver running Apache with a simple bash script. You might ask how can we protect all of our hard work after creating this server? The answer is version control.
As a Cloud-Computing Engineer, experience working with a wide range of DevOps tools such as Git and GitHub allow us to continue learning new skills and methodologies while tracking and maintaining our progress. Tasked with editing files and updating source code for the team, manually checking the code before putting it into production, it’s best practice to have some form of version control.
Versioning is a recommended approach to backing up files as protection against hardware failures and user errors. To create versioned backups you can use established backup programs, or an open source tool such as Git.
Git is a distributed version control system that tracks changes in any set of computer files. Commonly used for coordinating work among programmers, collaboratively developing source code during software development. Its goals include speed, data integrity, and support for distributed, non-linear workflows.
What is the Difference Between GIT and GITHUB?

- Git: is a tool that’s used to manage multiple versions of source code edits that are then transferred to files in a Git repository.
- GitHub: serves as a location for uploading copies of a Git repository.
Overview
-Xabiere Designs is a new small business hired to manager the digital footprint of Aquarian Contracting Technologies. The first task will be to create a repository on GitHub to manage and track all changes to the source code using Git. Let’s get started.
Objectives:
- Fork the Level Up In Tech Repository:
https://github.com/LevelUpInTech/LevelUpTeam- Clone the forked repo to your ACG cloud server environment.
- Using Vim, create a change to the linux.sh file that is in the repo directory.
- Save the file and add to your local repo, then commit the file.
- Push the file back to your own GitHub repository.
- Send a pull request to merge with Level Up In Tech production repository.
Prerequisite:
- Linux server (Centos 8)
- Secure Shell (SSH) access to your server
- GitHub account
When we navigate to GitHub.com and locate the search tab, we will search for the Repository we wish to Fork.
- Fork: Click on the
Forkdrop down tab, which will exposes the “create a new fork” tab for the Repository we want to fork.

- CLONE: Click on the
Codedrop down tab, which will exposes the URL of the Repository you wish to clone.

- COPY: Copy the
<URL>of the Repository you wish to clone.

- Now we will navigate to our terminal and
SSHinto our server.

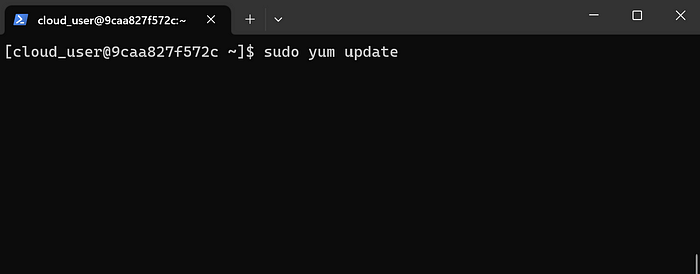
- Remember to update your environment for all of the latest security patches.
- You will be prompted to enter your root password because this will reconfigure your environment settings.

- Please don’t forget your password, as you can see below when I attempt to install Git I ran into a few issues but we should be able to install the package once the elevated permissions have been verified.

- Let’s verify that Git has been installed correctly by running the
which gitcommand.

- It’s good practice to confirm you have the correct version of Git because as packages are updated, functionalities change and you want to achieve the results you expect to obtain.

- Let’s take a quick look at things to see exactly what has been installed by running the
lscommand. Once this has been done we will clone our repo with the URL we copied by running the command:git clone <URL>

- We can see our repo has been cloned by taking an expanded look by running the
ls -acommand.

- Here we can see the LevelUpTeam directory, let’s
cdinto this directory and take a look around.

- Now we will edit the linux.sh file by entering the text editor Vim by running the following command:
vim linux.sh

- Save and exit Vim and cat out the file to see if your file has been updated.
cat linux.sh

- Now to track our changes we simply add our progress to our Git repo with the following command:
git add linux.sh

- Aquarian Contracting Technologies love updates, so we verify our investment by checking that our changes have been made with
git status

- The output shows that we have modified and staged one file. The green indicates that this file has been successful added and is staged and ready to be committed.

- There are several ways to commit a file, by running the
git commit -m "some text"we will be required to enter “some text” to track this commit.(the text can be anything you want)

- Git allows you to configure your global environment variables. These variables allow you to track changes by username or email. These are for tracking purposes only and can be configured by running the following commands:
git config --global user.name "User Name";git config --global user.email "User Email"

- After the global environment variables have been set you will be ready to push your staged changes to your repo.

- Now let’s push our code to GitHub by running the command
git push -u origin main

- Oh No! When we ran into an error, the best thing to do is copy the error code and query your favorite source of information to discover a possible solution to correct the issue.

- Stack overflow is a great resource for errors as we all need a little help every now and then.

Create a Personal Access Token to proceed.
- Navigate to the developer settings.

- Next we will select Personal access tokens, under Tokens (classic), Regenerate a token.

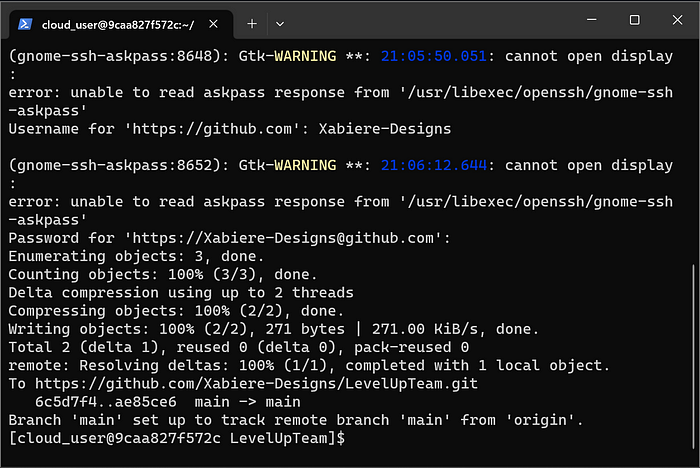
- After you have obtained your token, you will need to clone your token by running the following command:
git clone https://<tokenhere>@github.com/<user>/<repo>.git
- Great! we have successfully cloned our Personal access token.

- Now let’s push our code to our repo.
- You will need your global user name and email as this will validate the owner of this push.

- Let’s verify that our staging area is clear and see if our code has been pushed to our GitHub repo.

- Perfect! and now we can see that our code has been pushed to our GitHub repo.

Finally we can submit our Pull request to our original repo.
- Create pull request: Select the create pull request tab which will give you a menu to add text to justify your pull request.

- Commit: After you enter some text to notate your pull request hit commit.

Success!!!!
Conclusion!
In this tutorial we learned version control using Git and GitHub. We created a local repository as well as a GitHub repo. After making some updates to a file to push, we ran into an permissions roadblock. We addressed this by creating and cloning an Personal access token. This was an example of a company (Xabiere Designs) hired to manage the digital footprint of another company (Aquarian Contracting Technologies) growing business needs, and the tools that can track the progress of this task. Hopefully this tutorial was fun and informative. Thank you for following along, happy coding!